How to install ESXi Virtual Machine on EQ12
2023-04-19 15:55:09
Beelink has recently released the EQ12 mini PC.It is equipped with Intel 12th Alder Lake-N100 processor with 4 Cores, 4 Threads and 6MB L3 cache. After special adjustment by Beelink’s R&D engineers, the TDP of the processor can reach 25W, and the Max Turbo Frequency is 3.4GHz. The performance of the N100 is comparable to the 10th generation Core i3 series processors with TDP configured at 25W, and is more than 30% better than the previous generation Intel Jasper Lake Celeron N5105.Apart from excellent performance, EQ12 features two 2.5G Ethernet ports.
It is suitable for soft routing or all-in-one because the new generation Alder Lake N100 processor has a minimum power consumption of 6W. According to multiple tests by Beelink’s engineers, the mini PC can run 24/7 and keep stable performance. EQ12 adopts Intel i225-V 2.5G Ethernet, and is natively supported by EXSi 8.0b. It is quite easy to install. The extra Ethernet port can be soft routed to other devices.
How to install ESXi for all-in-one
We have made the system files into package, which is very convenient to import and use. If you want to install othersystems, you can skip the installation and configuration of the package we provide, then convert the system image file to a virtual file suitable for ESXi systems and install it by yourself.
Tools:
1.a USB flash drive with more than 8GB capacity
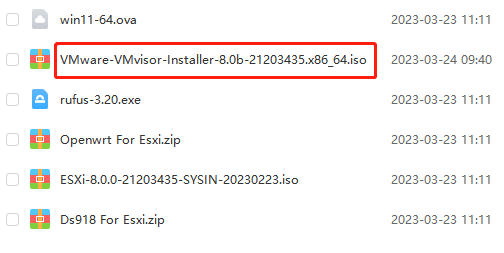
2.Esxi 8.0b ISO file
3.USB Flash Drive Writing Tools - Rufus
4.Openwrt firmware (soft router)
Downloads for all tools and ISO file:
https://drive.google.com/drive/folders/1eYVPbtLn5gP3Pzi8Qgv6ucUxOeTA3GjB
ESXi installation:
1. Download ESXi ISO file.
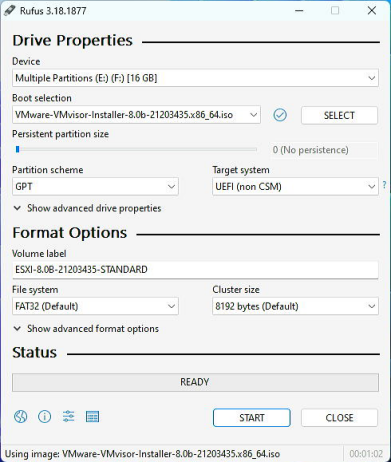
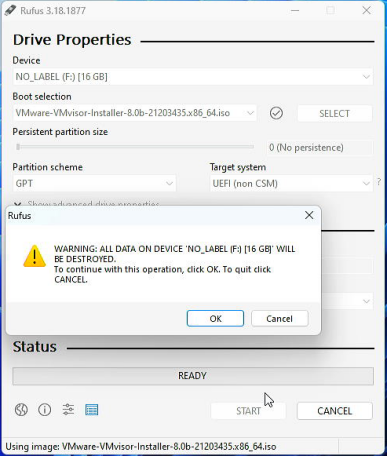
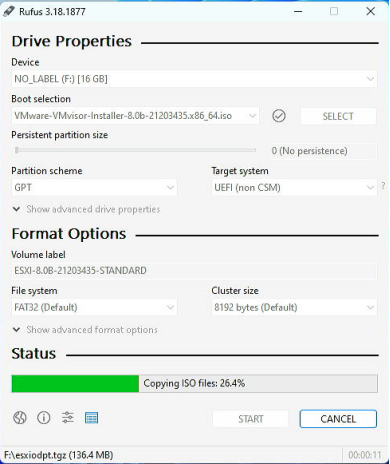
2.Use Rufus to write the file into USB Drive. Select “write in ISO mode”.
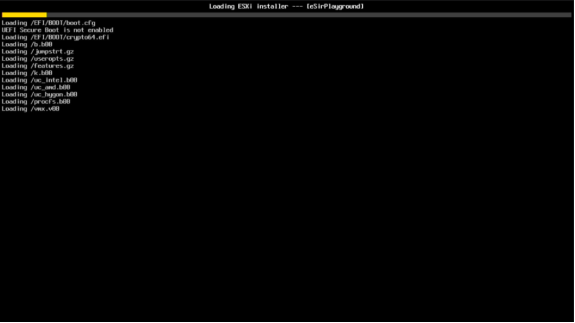
3.After the writing finished, plug the USB Drive in the EQ12 host. Press the F7 key after booting and select the USB
disk that you use. Press the [Enter] to enter the ESXi installer.
The loading process may be slow, please be patient.

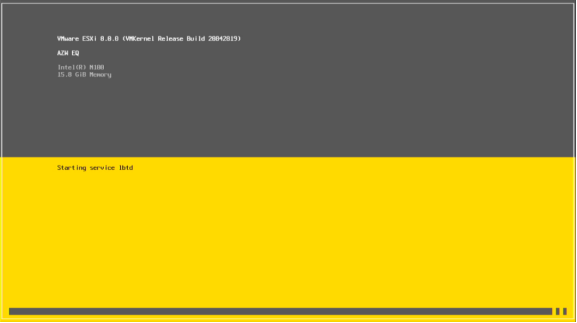
4.After entering the installation page, press the Enter key to the next step.
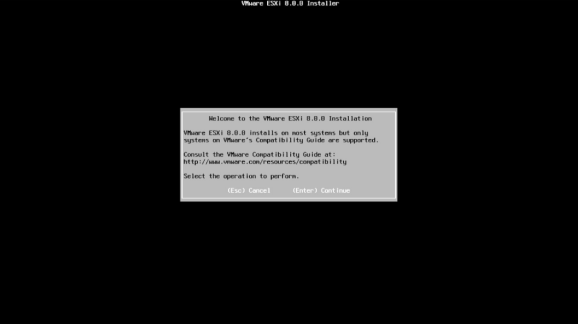
5.Press the F11 key to continue the installation.

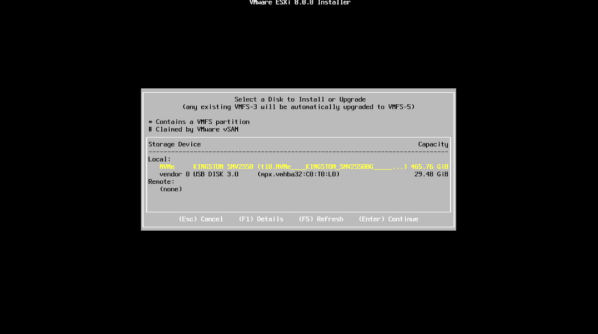
6.Select the local storage device according to your need. Press the Enter key.
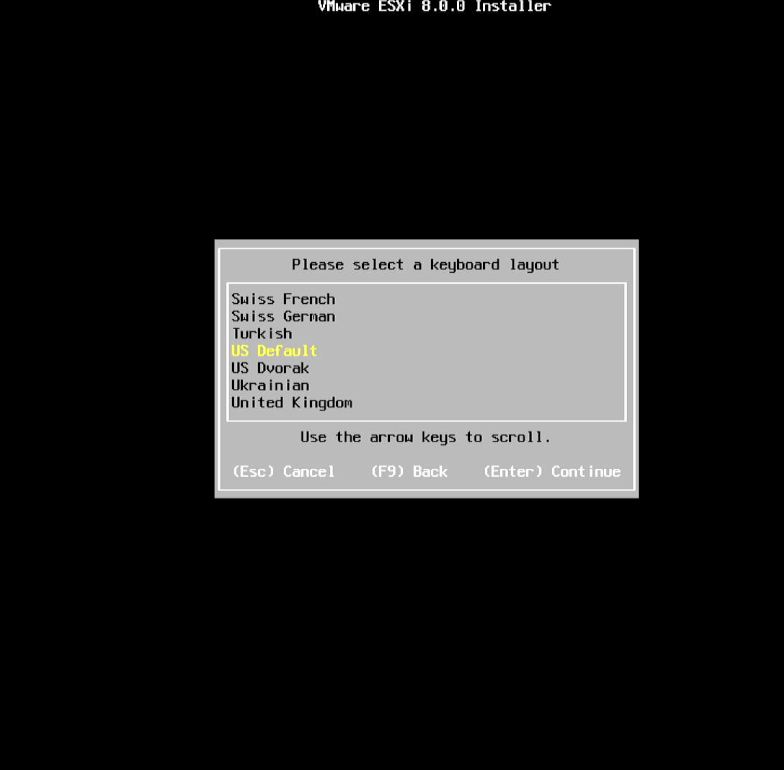
7.Select the default language. Press the Enter key.
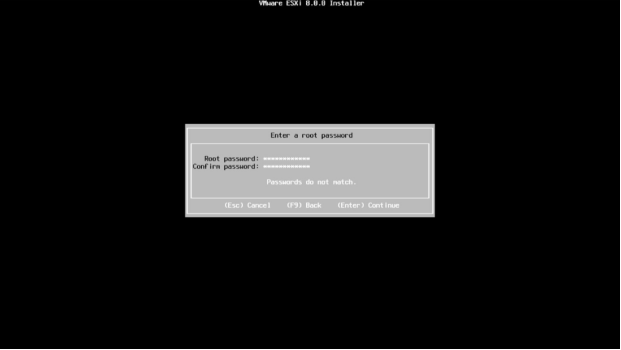
8.Set root password. Press the Enter key.
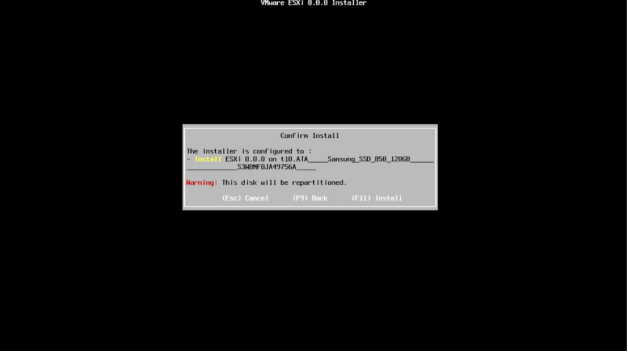
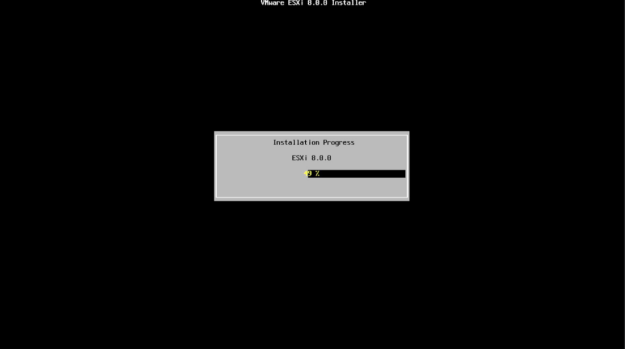
9.Press the F11 key and wait for the installation process to complete.
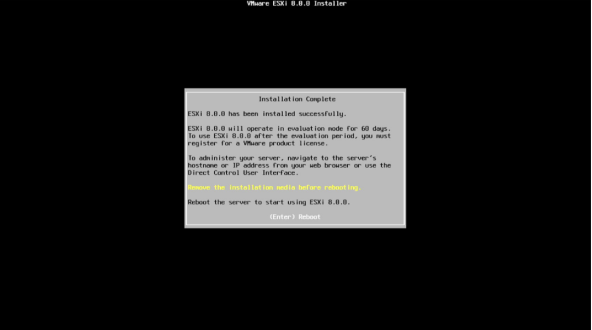
10.When the installation completes, unplug the USB drive, press the Enter key and wait for the PC to reboot.
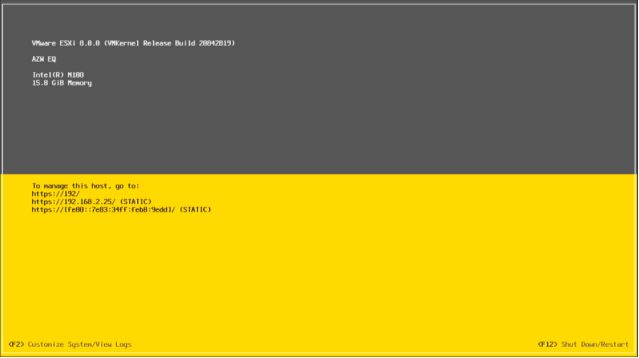
11. After rebooting, the following page indicates that you have finished the installation of ESXi system.
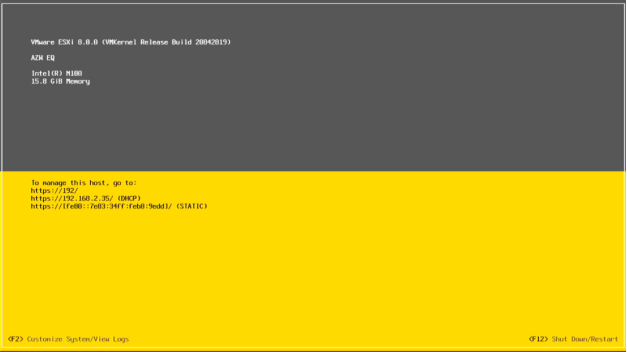
(-If you skip step 12-17, default parameters will automatically apply.)
12.Press the F2 key to set a static IP address. You need to enter the password.
Login name: root
Password: Fill in the password you set during the system installation.
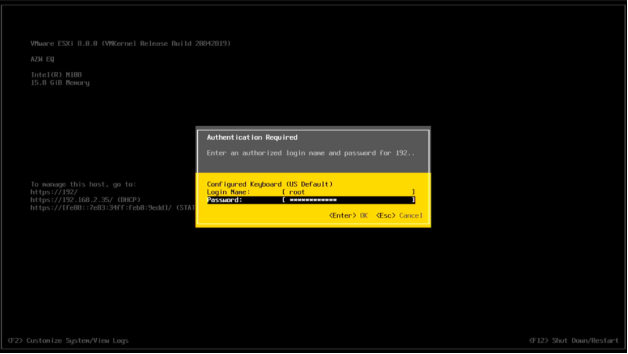
Press the Enter key.
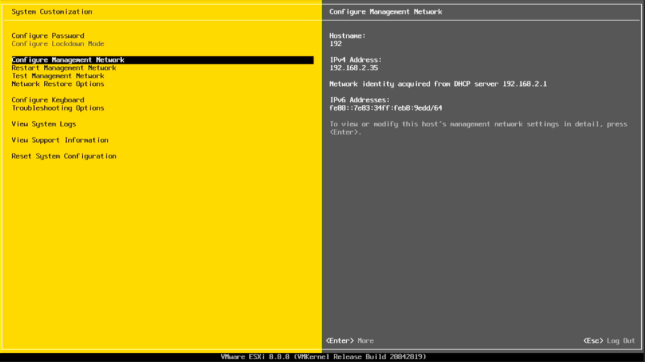
13. Use up or down arrow keys to select [configure management network] and press the Enter key.
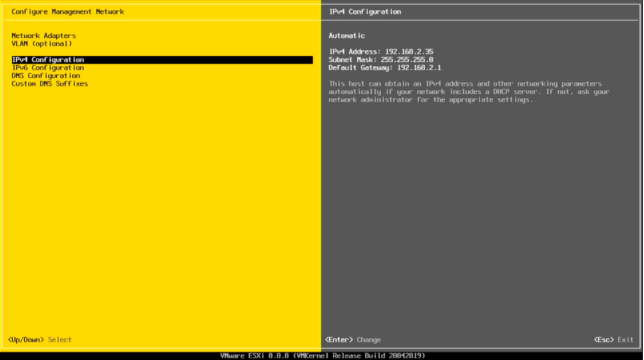
14.Select [IPV4 configuration] and press the Enter key.
15.Select the third item and press the spacebar to confirm the selection.
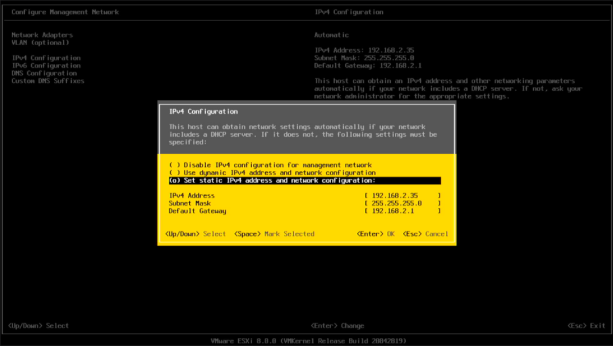
16.IPv4 address: Fill in the static IP address of the ESXi on the same network segment as the router. Subnet Mask: 255.255.255.0
Default Gateway: Fill in the router's gateway address.
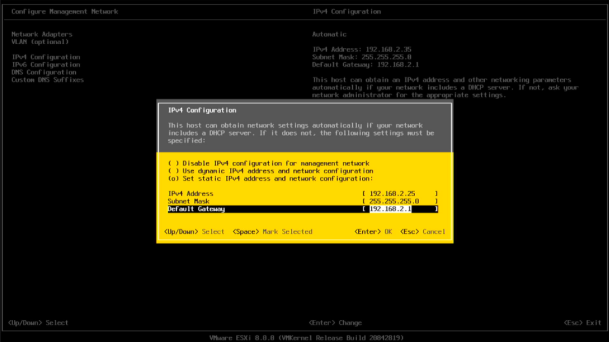
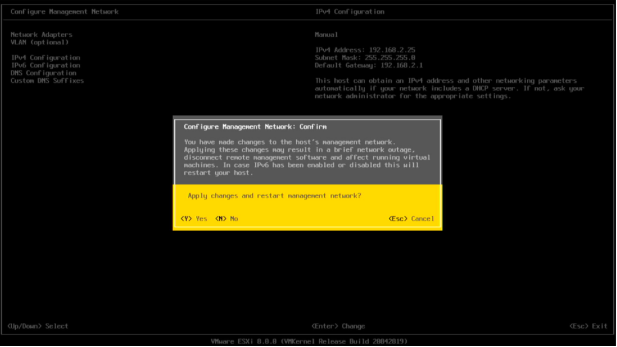
Press the Enter key.
17.Press the Esc to return to the main page and select “yes” to save.
18. Now you have finished the ESXi installation and configuration. Enter the IP address that was automatically assigned to access the client. Enter the password to log in the backend management.
How to install system on ESXi
If you want to install other systems, you need to download relevant image file, and then convert the .img file into a virtual file that can be used by ESXi through the Starwind.
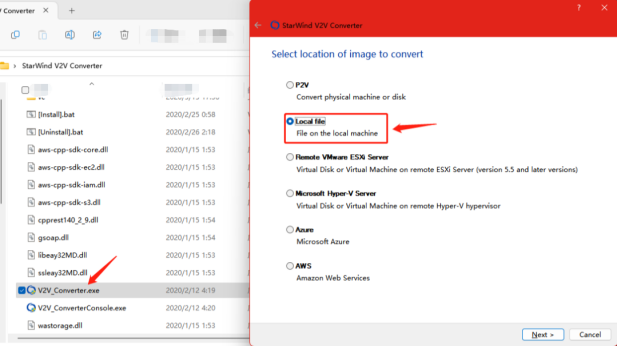
1.Download the zip package and unzip it. Run the V2V_Converter.exe program and select [Local File]. If the image source file is in ESXI or Hyper-V Server, you will need to provide credentials of the software to connect to the remote device.

2.Select the image file that needs to be converted. After selecting, the file format and size will be displayed in V2V Converter.
3. Select the target location of the converted file. If you choose to store the converted file locally, then select [Local File]。If you want to store the converted image on the ESXI or Hyper-V Server, the software will require you to provide credentials to connect to the remote device.

4.Select “VDMK”and click “Next”.
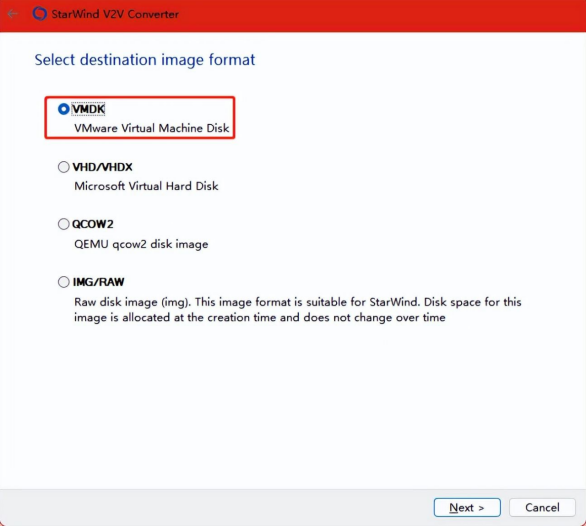
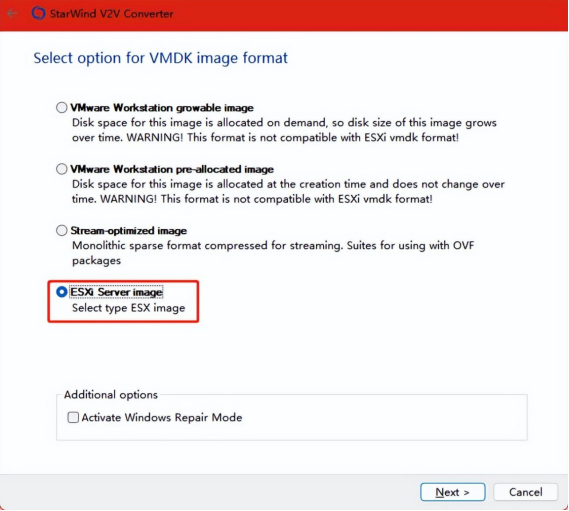
5.Select “ESXi Server image” according to the image application requirements. VMware Workstations and ESXi Server VMDKs are slightly different and may not be interoperable. Using the wrong image may lead to file system corruption, file system anomalies, system unbootable, etc. Please confirm the image format before conversion.
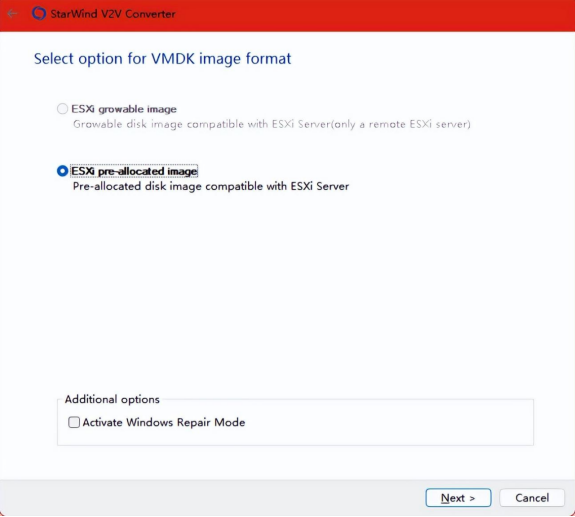
6.If the target location is selected as local, the format of the converted image can only be pre-allocated, and if you select a remote device as location, you will have the option to convert the image to either a growable or a pre-allocated image.
7.Confirm the file name and click “Convert”.
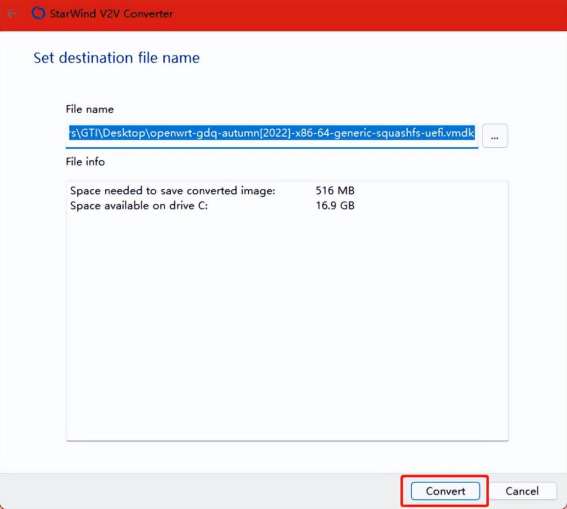
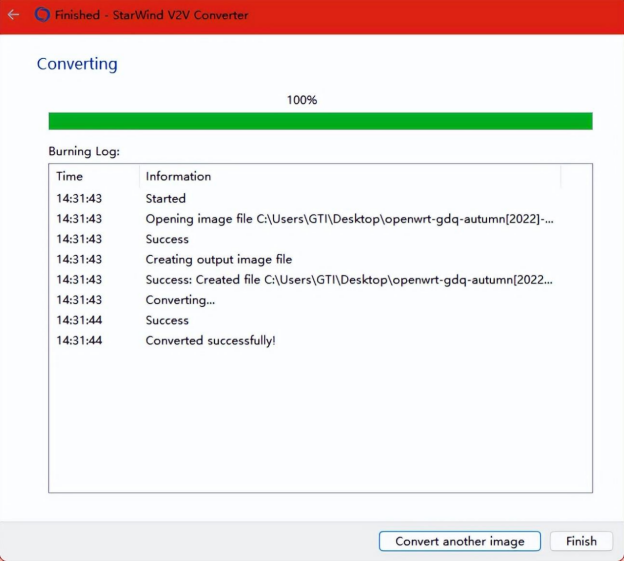
8. If progress bar reaches 100% and it shows “Conversion successful!”, you have finished the conversion of the image file.
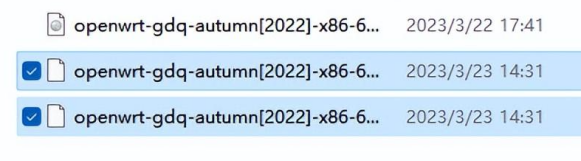
9. The converted VMDK will appear as two files: .vmdk、
-flat.vmdk. Make sure the two files are in the same path when you use them in ESXI, otherwise they won't work!
.vmdk: Store various types of declarations, such as virtual disk names, etc. -flat.vmdk: Virtual disk file.
Import the converted virtual files into your ESXi system and install them.
We hope this article helps. If you encounter any problems that cannot be solved, please contact us and we will help you fix them!